How to Avoid or Solve the 99 Variant Limit Problem inside Shopify.
When you first start your business, you usually only have to organize a small number of products with just a few variants. However, as your business and your products mature, you might find yourself needing to add additional variants to each product, and eventually, you'll reach the limit of variants possible inside of Shopify. This is a very common problem which is also known as 'the 99 limit problem.'
In this post we're going to learn:
How to solve this problem using a custom code and structuring your store yourself.
How to solve this problem using an app which allows you to have an unlimited number of variants for only $10/month.
How to Create a Custom Code and Structure Your Store Yourself
To begin with, go to the dashboard and open 'Products.'

Note: In this demo, I've created the products already.
Below you can see three products: '99 Problems,' '99 Problems - Cotton,' '99 Problems - Poly.'

To see how these products are currently set up, go to 'Reorder variants.'

Once you open this, you can see that we've got four sizes: small, medium, large and XL; four colours: yellow, red, orange, and blue; and three materials: cotton, poly, and wool.
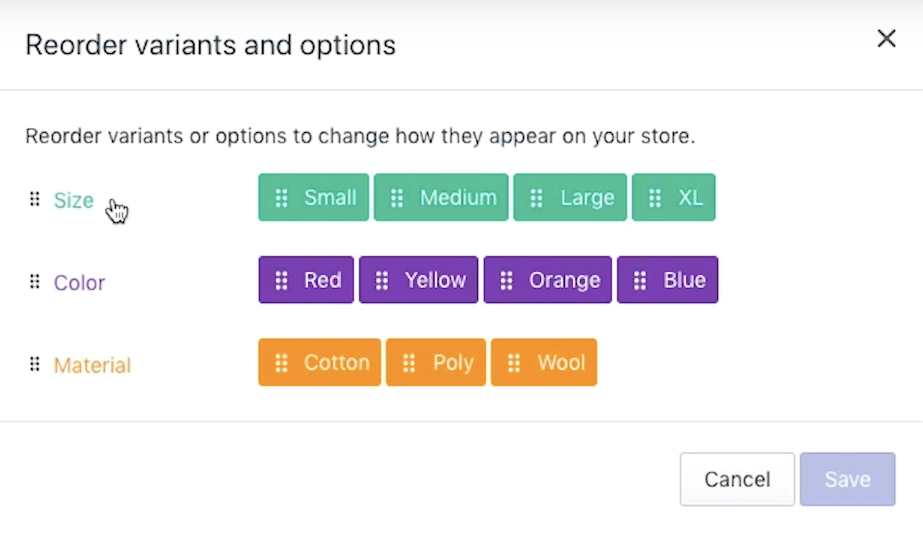
Note: If you look at the variants down below, the list is rather long and it's going to be quite challenging to maintain this current setup, which is why we are going to modify it.


First, you're going to modify the variants. Change the options so that you only have the size and the colour for the time being. If you have multiple colours and multiple materials, I would most likely recommend that you do this in two steps. Move out the material first and then the colour, so you're only dealing with the size of that specific product.
To do this, we go to 'Products,'
search for '99 Problems,' and as you can see below, I have already gone and created a new product for cotton and a new product for polyester. If you want to learn more about this, check out the blog post on how to create a product in shopify

Click on '99 Problems - Cotton.'
and if we hit 'Reorder variants,'

you'll see that we get to distinguish between the size (small, medium, large, XL) and colour (red, blue, orange, yellow).
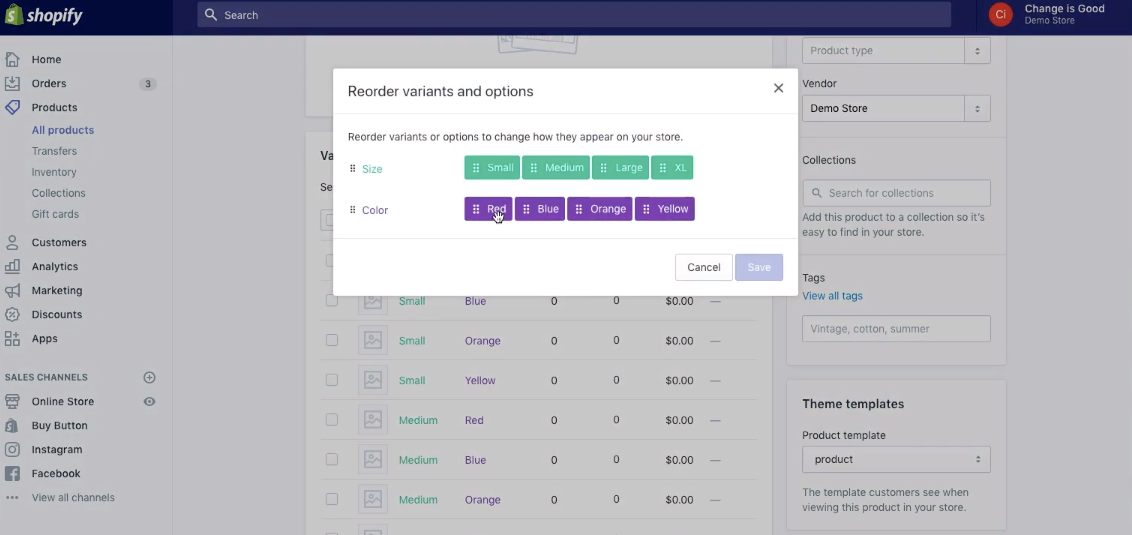
Note: When you set up the title, make sure that you add the variant (in this case the material) with a dash: '99 - Cotton.' I'll explain why this is important later on.


Note: When you're setting up your products, also make sure that all the titles are identical, the only thing that is going to be different is the dash variant at the end.
Once we've set up the two different variants (size and colour), we can create an additional drop-down menu by making some adjustments to the theme. This will allow us to get an additional drop-down menu that's hard-coded into our theme. That way, the experience of the user on our page is the same as if they had the three variant option. By adjusting the theme, it's going to redirect them to a new product page when they switch the variant.
To do this, go to 'Online Store,' click on 'Themes' and select 'Edit code' in the drop-down menu.
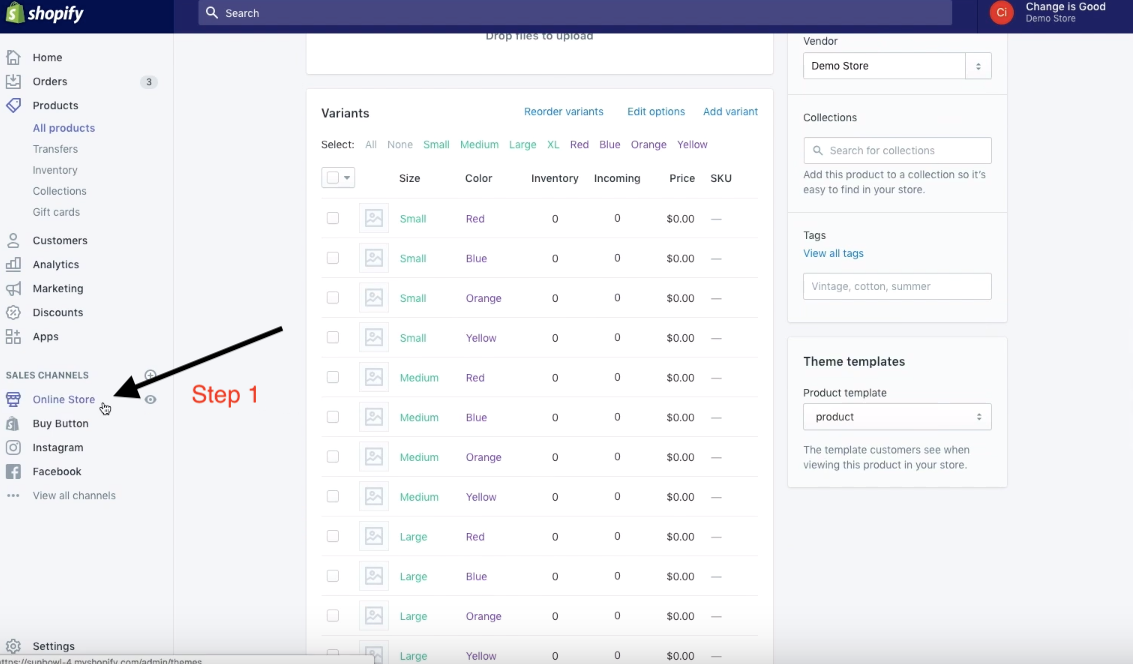

Once we're here, we're going to look for the snippet called 'product.liquid.'

Then we go down and look for the product variant form. This form is what switches out the variants that you've selected for your product.
If we scroll down, we can see the '<form action' and we know that we're in the right place.

To create an additional drop-down we need to add a bit of HTML code to our site.

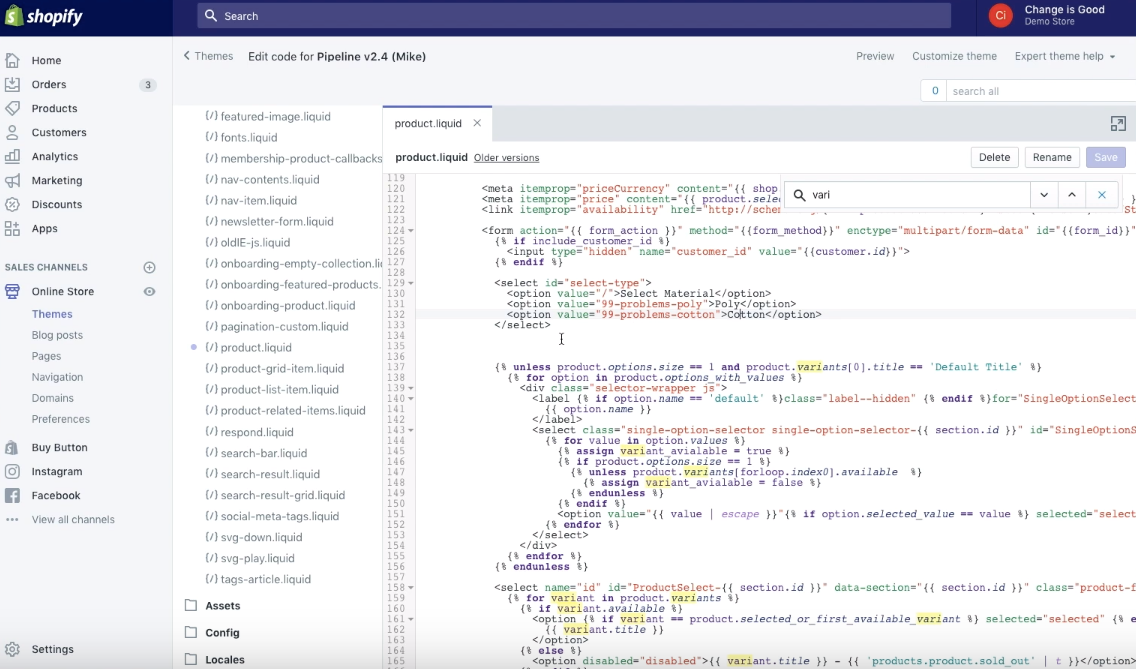
Here's the snippet of the HTML code I added:
<select id="select-type">
<option value="/">Select Material</option>
<option value="99-problems-poly">Poly</option>
<option value="99-problems-cotton">Cotton</option>
</select>

As you can see in the screenshot below, there are three different options:
The first option is 'Select Material.' It has no value underneath the option other than a slash, which is going to be the URL.
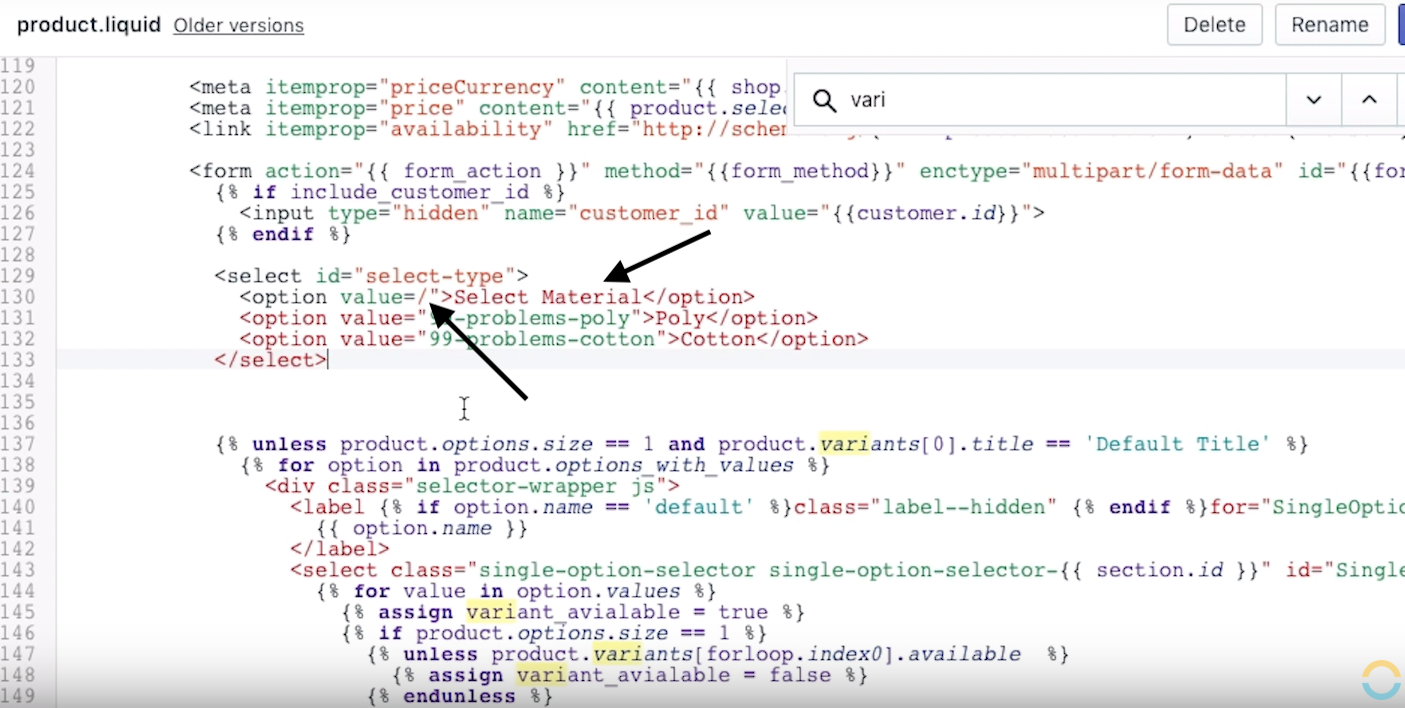
The second option is '99-problems-poly' and the third option is '99-problems-cotton.'
Note: The second and the third option both started with '99-problems,' but one ended with '-poly' and the other one with '-cotton'.


If we save what we've added in here and refresh our product page, we will see that we now have some material showing up: '>Poly</option>' and '<Cotton</option>'.

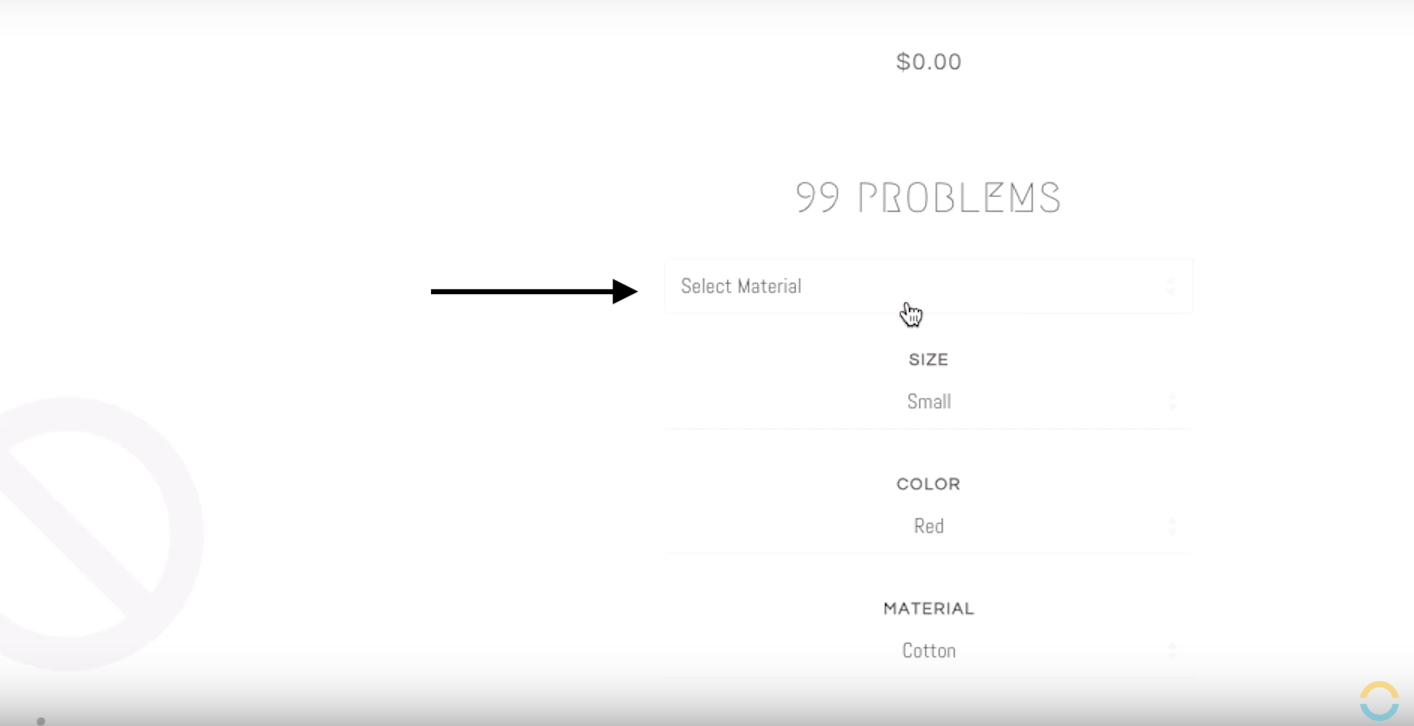
And if we head to the drop-down menu, we'll see that we can now access the two options 'Poly' and 'Cotton.'

Note: The HTML code itself won't trigger any action. It's only by adding some JavaScript that it's going to redirect the page once we click on the items of the drop-down menu.

Here's the snippet of the JavaScript I added:
$( document ).ready(function() { $("#select-type").change(function(){ var selectedCollection = $(this).children("option:selected").val(); window.location.href = "/products/" + selectedCollection; }); });
Note: We're using jQuery as a library.
The first one is 'select-type' which refers to the ID of the select field that I used before.

If we scroll up in our code, we can see that it's the ID of the select type.

We've also set a change function so that every time someone changes the drop-down, it's going to trigger an action.

We've also got a variable called 'selectedCollection,' which we're using to make our code simple and easy to understand so that we can reuse this variable later on.

And then we're going to use the child object of the selected box (which refers to the option) and grab its value.

As you can see below, the value inserted '99-problems-poly' refers to the handle of the product we want to redirect to.

Note: This is because once we go to our next line 'window.location.href =', we've got '/products/' ('products' is the beginning part of the URL structure inside Shopify) which we append to 'selectedCollection;'.

Once we save everything, go back to the store, and refresh the page we get to see the handle of the basic product '99-problems' and if we select the material 'Poly' in the drop-down menu,


the page will refresh and you will be redirected to '99-problems-poly' or '99-problems-cotton,' respectively.

As you create your structure, you can maintain the different variants of your products, but because they're split out, you don't have to worry about the 99 variant limit problem anymore.
How to Solve the 99 Variant Limit Problem With the Help of an App
An alternative solution, if you do not feel comfortable adding code yourself, is using the app called Bold Product Options, offered by Bold Commerce for only $10/month. This app allows you to do precisely what we've just self-programmed above but provides a few extra features.
If $10/month is within your budget, I recommend using the app solution rather than doing the custom coding solution yourself. It's a great app as it allows you to have a graphical user interface to move and modify things inside the dashboard. However, if you're comfortable coding and are on a tight budget, what I have outlined above will do the trick!
If you're having trouble installing anything, please feel free to contact us, and we'd be happy to help you out!
To receive updates, drop your email in the form below and we will let you know each time we post a new blog.

